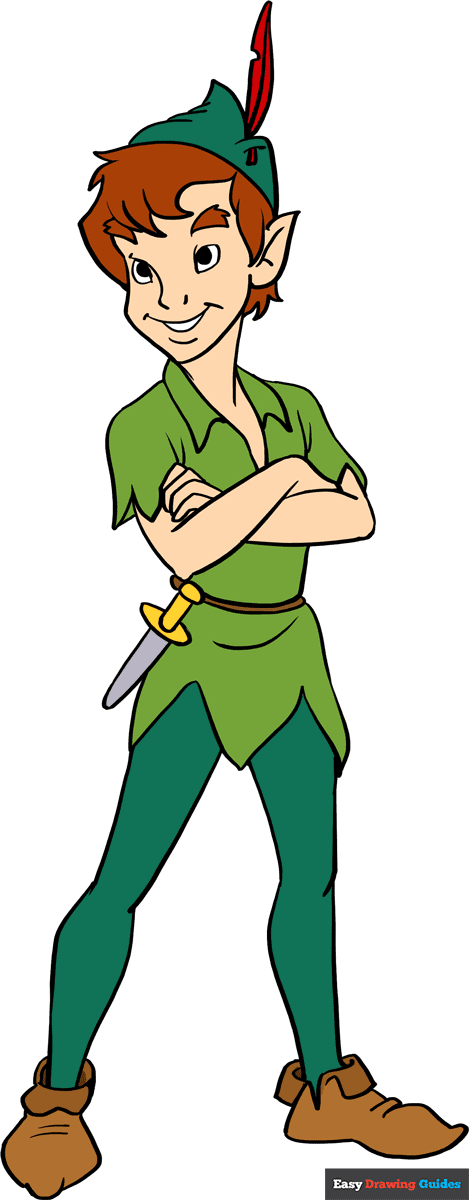
Learn to draw Peter Pan with this simple step-by-step guide. Start sketching the boy who never grows up today.
Peter Pan Step by Step Drawing Guide:Drawing the iconic character Peter Pan can spark your imagination and take you on a creative adventure. This guide is perfect for beginners and those looking to refine their artistic skills. You’ll capture the essence of Neverland’s eternal youth with easy-to-follow instructions.
Our tutorial provides a structured approach, ensuring that even novice artists can create a recognizable and lively depiction of Peter Pan. Embrace the magic of drawing as you bring to life one of literature’s most beloved characters. Whether you’re an aspiring artist, a Disney enthusiast, or simply seeking a fun activity, this Peter Pan drawing tutorial is your ticket to artistic achievement. Grab your pencils, and let’s embark on this artistic journey to capture the playful spirit of Peter Pan on paper.

Credit: www.youtube.com
Introduction To Peter Pan
Peter Pan is a classic character many love. He lives in Neverland and never grows up. Kids and adults enjoy his adventures. This guide will teach you to draw Peter Pan step by step.
The Timeless Appeal Of Peter Pan
Peter Pan is a timeless character. He represents freedom, adventure, and the magic of childhood. His story inspires us to believe in the impossible. Drawing Peter Pan connects us to these timeless themes.
Connecting Art With Imagination
Drawing Peter Pan fuels our imagination. It makes us dream of flying and magical lands. This activity is not just about creating art. It’s about bringing our dreams and stories to life. Let’s start drawing Peter Pan together!

Credit: www.youtube.com
Materials Needed For Drawing
Before drawing Peter Pan, gather the right materials. Quality tools help create beautiful art. Let’s choose the best paper and pencils for your drawing journey.
Choosing Your Paper And Pencils
Smooth, thick paper works best for drawing. It allows for easy erasing and shading. Use a sketch pad or heavyweight paper.
- Smooth sketch pad (100 gsm or higher)
- Heavyweight drawing paper
Select pencils for sketching and shading. A range of HB to 6B pencils is ideal. Start with lighter HB pencils. Add depth with 4B to 6B pencils.
- HB pencil for light lines
- 2B pencil for medium lines
- 4B-6B pencils for dark shading
Additional Drawing Supplies
Other supplies enhance your drawing. Use an eraser for corrections. A sharpener keeps pencils ready.
| Supply | Use |
|---|---|
| Eraser | Correct mistakes |
| Pencil sharpener | Maintain sharp points |
| Ruler | Draw straight lines |
Consider a blending stump for smooth shading. A fine liner can outline your drawing. These tools add detail to your Peter Pan artwork.
- Blending stump for smooth textures
- Fineliner for clear outlines
Basic Shapes And Proportions
Ready to draw Peter Pan? Start with basic shapes and proportions. These simple forms create a strong foundation. Even beginners can capture Peter’s playful spirit this way. Let’s fly into the drawing process!
Sketching The Framework
Drawing starts with a skeleton sketch. This helps place features correctly. Use light lines for easy adjustments. Begin with a circle for the head. Add a spine line for posture. Sketch simple shapes for the body. Think of rectangles for the chest and hips. Limbs are lines with circles for joints. Keep the framework balanced and dynamic.
- Head: Circle shape
- Spine: Straight or curved line
- Chest and hips: Rectangle forms
- Limbs: Lines with circle joints
Understanding Peter Pan’s Silhouette
Peter’s silhouette is unique. It’s youthful and lively. His head is a circle, not too big. Shoulders are narrow, waist is slim. Legs and arms are slender. His pose often shows movement. Capture this in the initial sketch. Check proportions by comparing parts. The head should fit into the height about seven times. Adjust shapes to match his silhouette.
| Body Part | Shape | Proportion |
|---|---|---|
| Head | Circle | 1/7 of height |
| Shoulders | Narrow | Less wide than hips |
| Waist | Slim | Smallest body part |
| Arms/Legs | Slender | Long and thin |
Outlining Peter Pan’s Figure
Embark on the magical journey of bringing Peter Pan to life through drawing. Start by outlining his figure with simple shapes and lines. This step sets the foundation for a lively portrayal of the boy who never grows up.
Drawing The Head And Facial Features
Begin with an oval for the head. Sketch light guidelines to place the eyes, nose, and mouth. Peter’s eyes sparkle with mischief, so shape them with a light touch. Add a cheerful smile to capture his playful spirit. Remember, Peter’s youthful look is key.
- Oval for head
- Guidelines for placement
- Sparkling eyes
- Cheerful smile
Capturing The Essence Of His Pose
With the head in place, sketch a line for the spine. Add a circle for the torso and a smaller one for the hips. Peter’s pose is dynamic and full of energy. Draw his arms and legs with a sense of movement. Imagine Peter mid-flight or ready to embark on an adventure.
| Body Part | Shape | Action |
|---|---|---|
| Spine | Line | Defines posture |
| Torso | Circle | Anchors body |
| Hips | Smaller circle | Supports legs |
| Arms/Legs | Lines and shapes | Shows movement |
Detailing The Costume And Accessories
Welcome to the magical realm of drawing Peter Pan, the boy who wouldn’t grow up. In this section, we delve into the whimsical details that bring his character to life. We will craft Peter’s iconic ensemble and add the charming accessories that complete his Neverland adventurer look.
Creating The Iconic Outfit
Begin with a sketch of the basic shape of Peter’s attire. His outfit features a tunic that falls just above the knees.
- Start with a V-shaped neckline.
- Draw loose, short sleeves.
- Include the jagged hem to mimic leaves.
Color the tunic in shades of forest green.
Adding Details Like The Dagger And Shoes
Peter’s look isn’t complete without his trusty dagger and pointed shoes.
| Dagger | Shoes |
|---|---|
|
|
Remember to draw belts and buckles for a touch of Neverland flair.
Bringing Life Through Expressions
Drawing Peter Pan is fun and magical. Expressions bring him to life. Let’s learn how to draw his face and body with real emotions.
Crafting The Facial Expression
Peter Pan’s face is full of wonder and mischief. Here’s how to capture that:
- Start with the eyes. Make them large and sparkling. Eyes show his playful spirit.
- Draw a wide smile. It shares his joy for adventure.
- Don’t forget the eyebrows. Raised eyebrows add to his curious look.
These steps make Peter’s face lively and inviting.
Animating The Posture And Gesture
Peter Pan’s body language tells a story too. Here’s how to draw it:
- Lean his body forward. This shows he’s always ready to jump into action.
- Draw one hand on his hip and the other pointing. It looks like he’s leading the way to Neverland.
- Make his legs slightly bent. It seems like he’s about to fly.
These steps will make Peter Pan look like he’s ready for an adventure.
Fine-tuning And Shading Techniques
Fine-Tuning and Shading Techniques are key to bring Peter Pan to life. They help your drawing look more real. Let’s learn how to add depth and make your drawing pop!
Enhancing Depth And Dimension
Adding depth makes Peter Pan look like he could jump off the page. Follow these steps:
- Use light and dark: Darker areas appear far away. Lighter areas seem close.
- Draw shadows: Imagine where the sun hits Peter. Draw shadows opposite to it.
- Outline carefully: A slightly thicker outline brings Peter forward.
Tips For Realistic Shading
Shading adds life to your drawing. It makes Peter Pan look 3D. Here are tips:
- Choose the light source: Decide where the light comes from. Shade accordingly.
- Use pencil grades: Start with light (2H) pencils. Finish with darker (6B) ones.
- Smudge for smoothness: Use a paper stump to smudge pencil lines. It looks natural.
Practice makes perfect. Keep trying these techniques. Soon, your Peter Pan will look amazing!

Credit: www.pinterest.com
Final Touches And Presentation
The journey of bringing Peter Pan to life on paper nears its end. A touch of magic lies in the final strokes. Here, artists refine and present their creation with pride.
Erasing Guidelines And Refining Edges
Once the main drawing completes, artists erase the initial guidelines. Clean lines make Peter Pan sharp and clear. Bold the character’s outline for a standout effect. Use a fine eraser for precision.
Displaying Your Finished Artwork
Display your artwork with joy. Choose a frame that complements Peter Pan. Consider the background color to make your drawing pop. Share your artwork with friends or on social media. Celebrate your artistic journey.
| Step | Action |
|---|---|
| 1 | Erase guidelines carefully |
| 2 | Refine edges with a sharp pencil |
| 3 | Choose a fitting frame |
| 4 | Consider background color |
| 5 | Share and celebrate |
Expanding Your Skills
Expanding your skills in drawing Peter Pan can be thrilling. Mastering the basic outline is just the start. Now, it’s time to dive deeper. With a sprinkle of pixie dust, let’s explore how to enhance your Peter Pan drawings. Unlock a world of artistic potential!
Experimenting With Different Styles
Drawing Peter Pan can be more fun with style experiments. Try out different techniques. Go from classic to cartoonish, or even manga style. Each style brings out a unique charm in Peter Pan.
- Classic: Focus on realistic features and proportions.
- Cartoon: Exaggerate expressions and body shapes.
- Manga: Aim for big eyes and dynamic poses.
Incorporating Color And Backgrounds
Color breathes life into your Peter Pan sketches. Start with soft shades for skin and hair. Choose bright greens for his iconic outfit. Then, add a background. It could be the London skyline or the magical Neverland. Use color to create mood and atmosphere.
| Element | Color Suggestion |
|---|---|
| Skin | Peach |
| Hair | Brown |
| Outfit | Green |
| Background | Blue and Green |
Conclusion: The Joy Of Drawing Peter Pan
Embracing the magic of Peter Pan’s world through drawing brings a unique delight. Recreating the whimsy of Neverland and its inhabitants offers not just a fun activity, but a way to connect with the childlike wonder within us all. Let’s reflect on the skills honed and the creative journey we’ve embarked upon.
What We’ve Learned
- Proportions are key for Peter’s youthful look.
- Expressions bring his mischievous personality to life.
- Attention to details like his outfit adds authenticity.
Inspiring Continued Creativity
Drawing Peter Pan ignites a spark for ongoing artistic exploration. Keep this spark alive; practice regularly, experiment with different mediums, and always seek new sources of inspiration. Remember, every stroke on the paper is a step towards mastering the art of drawing.
Keep drawing, and let your imagination soar as high as Peter Pan flying towards the second star to the right!
Frequently Asked Questions
How To Draw Peter Pan For Beginners?
Start by sketching a simple stick figure of Peter Pan. Add a tunic, shorts, and boots to the outline. Draw his iconic hat with a feather. Sketch his youthful face and pointed ears. Refine the drawing, erase guidelines, and add details.
Finish with coloring.
How Do You Pan In A Drawing?
To pan in a drawing, click and drag your mouse across the canvas or use the arrow keys for finer control. Keep your movements steady for a smooth panning action.
How To Draw Peter Parker’s Face?
Start by sketching a simple oval for the head. Add intersecting lines for facial symmetry. Sketch eyes, a nose, and a mouth using these guides. Include Peter Parker’s distinctive features like his hairstyle and any subtle facial expressions to capture his personality.
Refine with shading and details.
How Do You Draw Tom Step By Step?
Begin with an oval for Tom’s head. Add two ear outlines on top. Sketch his eyes and nose below. Draw his body with a shirt and pants. Finish with his arms, legs, and tail.
Conclusion
Embark on a magical art journey with our Peter Pan drawing guide. Perfect for both beginners and seasoned artists, this tutorial has hopefully sparked your creativity and skill. Remember, practice makes perfect, so keep your pencils ready for more enchanting sketches.
Let the adventure continue in your sketchbook!


Leave a Reply