Did your favorite nonstick pan suffer a cooking mishap, leaving behind a stubborn burnt mess? It’s a common kitchen frustration. You were just trying to make a quick meal, and suddenly, the once-smooth surface is covered in blackened residue.
Don’t despair! This guide will show you exactly how to clean burnt nonstick pan without damaging its delicate coating.
By following these simple, effective methods, you’ll learn to restore your pan to its former glory. You’ll gain practical tips that save you time and money, preventing you from having to replace your cookware prematurely. Get ready to say goodbye to burnt-on food and hello to perfectly clean pans.
Safely Removing Burnt Food From Nonstick Pans
This section explains the general principles behind cleaning burnt nonstick pans and introduces the safest methods. It sets the stage for more specific techniques by emphasizing gentle approaches that preserve the nonstick surface. You will learn why harsh scrubbing is a no-go and what gentle alternatives are available. This will help readers understand the importance of the following steps and encourage them to read on for practical solutions.
Understanding Nonstick Pan Care
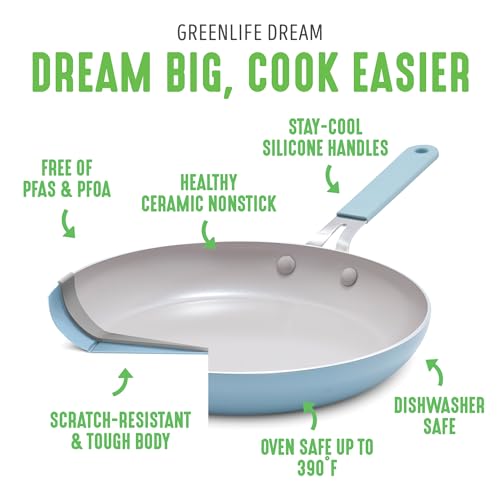
Nonstick pans are coated with materials like PTFE (polytetrafluoroethylene), commonly known by the brand name Teflon, or ceramic. These coatings allow food to slide off easily, making cooking and cleanup a breeze. However, they are also delicate and can be damaged by abrasive cleaners, metal utensils, and excessive heat.
When food burns on a nonstick pan, it essentially bonds to the coating. The key to cleaning is to soften this bond without scratching or peeling away the nonstick layer. Harsh scrubbing can create tiny pores in the coating, making it less effective and potentially allowing food particles to get trapped.
The goal is to lift the burnt residue gently. This involves using heat, moisture, and mild cleaning agents. Patience is also a virtue; some burnt messes may require a bit of soaking time to loosen.
Understanding these basic principles will help you choose the right method for your specific burnt pan situation.
-
Nonstick coatings are designed for smooth release of food. They are typically made from materials like PTFE or ceramic.
These materials create a smooth surface that food does not adhere to easily. This makes cooking with less oil and cleaning much simpler. However, this smoothness also means the coating is less durable than say, cast iron.
-
Abrasive materials can scratch and damage the nonstick surface. This leads to reduced effectiveness and potential health concerns if flakes enter food.
Think of sandpaper on a polished surface. Abrasives like steel wool or harsh scouring pads will physically remove the nonstick layer, exposing the metal underneath. This makes the pan prone to sticking and can release chemicals if the pan overheats.
-
Using metal utensils can also cause scratches. Opt for silicone, wood, or plastic tools instead.
Metal forks, knives, or spatulas can easily scrape the delicate surface of a nonstick pan. Over time, even light scratching can create areas where food starts to stick, defeating the purpose of a nonstick pan. Always use materials that are softer than the pan’s coating.
Gentle Cleaning Solutions You Can Use
Instead of reaching for harsh chemicals or abrasive pads, several common household items can effectively tackle burnt-on food. These are safe for nonstick surfaces and readily available.
Baking Soda Paste
Baking soda is a mild abrasive and a fantastic deodorizer. When mixed with water to form a paste, it can gently lift burnt-on food without scratching.
-
Mix baking soda with a little water to create a thick paste.
The consistency should be like toothpaste. This paste can then be applied directly to the burnt areas.
-
Spread the paste over the burnt sections of the pan. Let it sit for at least 30 minutes, or longer for very stubborn stains.
Allowing the paste to sit gives it time to work on breaking down the burnt food particles. This pre-treatment is key to making scrubbing easier and less aggressive.
-
Gently scrub with a soft cloth or sponge.
Use a non-abrasive sponge or a soft cloth. Avoid using the scratchy side of a sponge. Wipe away the paste and burnt residue.
-
Rinse thoroughly and dry the pan.
Ensure all baking soda residue is gone. Dry the pan completely to prevent water spots.
Vinegar Soak
White vinegar is acidic, which helps to break down burnt food. When diluted with water, it becomes a safe and effective cleaning agent for nonstick pans.
-
Pour equal parts white vinegar and water into the pan.
Fill the pan enough to cover the burnt areas. This creates a cleaning solution that will work on the residue.
-
Heat the mixture gently on the stovetop.
Bring it to a simmer, but do not boil vigorously. Simmering for 5-10 minutes should be enough.
-
Let the pan cool, then gently scrub with a soft sponge.
Once cooled, carefully pour out the vinegar-water mixture. Use a soft cloth or sponge to wipe away the loosened burnt bits.
-
Wash with mild dish soap and water, then dry.
A final wash with regular dish soap ensures no vinegar smell remains. Dry the pan thoroughly.
Specific Methods for How To Clean Burnt Nonstick Pan
Now that we understand the gentle principles, let’s explore specific step-by-step methods for how to clean burnt nonstick pan effectively. These techniques are designed to address different levels of burnt residue while prioritizing the integrity of your cookware.
The Baking Soda and Water Method
This is often the first line of defense for minor to moderate burnt-on food. It’s simple, uses common ingredients, and is very gentle.
When you notice burnt food stuck to your nonstick pan, don’t panic. The baking soda and water method is a great starting point. It relies on the mild abrasive and alkaline properties of baking soda to lift the burnt material without harming the nonstick coating.
This is particularly useful for food that has started to carbonize but isn’t deeply ingrained.
-
Sprinkle a generous amount of baking soda into the burnt pan. You want enough to cover the affected areas.
Don’t be shy with the baking soda. A good coating is essential for creating an effective cleaning paste.
-
Add just enough water to create a thick paste. Stir with a non-metal utensil until well combined.
The consistency should be similar to toothpaste – not too runny and not too dry. This paste needs to adhere to the burnt spots.
-
Let the paste sit on the burnt areas for at least 30 minutes. For tougher stains, you can leave it for a few hours or even overnight.
The longer the paste sits, the more time it has to soften and break down the burnt residue. This makes subsequent scrubbing much easier.
-
Use a soft sponge or cloth to gently scrub the burnt areas. Work in small circles.
Avoid using abrasive scrubbers. The baking soda is doing most of the work; you are just helping to lift the loosened debris.
-
Rinse the pan thoroughly with warm water. Wash with mild dish soap and a soft sponge if needed to remove any remaining residue.
Make sure all baking soda is gone. Rinse until the water runs clear.
-
Dry the pan immediately with a soft towel.
This prevents water spots and protects the nonstick surface.
The Vinegar and Water Simmer Method
For more persistent burnt-on messes, the acidic nature of vinegar can be very helpful. Simmering the mixture helps to speed up the process.
When baking soda alone isn’t quite enough, the vinegar and water simmer method provides a more potent yet still safe approach. The acetic acid in vinegar is excellent at breaking down the chemical bonds of burnt food. By gently heating this solution, you accelerate the process, making it an efficient way to tackle stubborn residues that have fused to the pan.
-
Pour equal parts white vinegar and water into the burnt nonstick pan. Ensure the liquid covers all burnt areas.
A 1:1 ratio is a good starting point. The liquid should be sufficient to submerge the problem spots.
-
Place the pan on the stovetop over medium heat. Bring the mixture to a gentle simmer.
Avoid a rolling boil. A gentle simmer allows the vinegar to work its magic without excessive steam or splattering.
-
Let it simmer for about 10-15 minutes. You should see the burnt bits starting to lift.
Keep an eye on the liquid level, adding a little more water if it gets too low.
-
Remove the pan from heat and let it cool completely.
Safety first. Let the pan cool down enough to handle safely.
-
Carefully pour out the vinegar-water solution. Use a soft sponge or cloth to wipe away the loosened burnt residue.
Most of the burnt food should wipe away easily at this stage.
-
Wash the pan with mild dish soap and warm water, then dry thoroughly.
A final wash ensures no lingering vinegar smell or residue. Dry immediately.
Dealing with Extremely Stubborn Burnt Spots
Sometimes, a burnt mess is particularly tenacious. In these cases, you might need to combine methods or allow more soaking time.
-
Repeat the baking soda paste application after a vinegar soak.
If the vinegar simmer loosened some but not all of the burnt food, apply a fresh baking soda paste to the remaining spots. Let it sit for another 30 minutes to an hour before gently scrubbing. This layered approach can break down even the most stubborn residues.
-
Allow longer soaking times for both baking soda and vinegar solutions.
Patience is key for tough jobs. Don’t be afraid to let the baking soda paste or vinegar solution sit overnight if necessary. The longer the cleaning agent has to work, the less scrubbing you will need to do.
-
Consider a gentle dish soap and hot water soak before using other methods.
Sometimes, simply filling the pan with very hot water and a good squirt of dish soap and letting it soak for a few hours can loosen minor burnt-on food. This is a good first step for less severe cases.
The Dish Soap and Hot Water Method
This is the most basic approach and works well for less severe burnt-on food or as a follow-up to other methods.
For lighter scorch marks or as a routine cleanup, a simple soak in hot, soapy water can be very effective. This method relies on the degreasing power of dish soap and the loosening effect of hot water. It’s the least aggressive option and should be your go-to for minor incidents.
-
Fill the pan with hot water. Add a few drops of mild dish soap.
Use the hottest water your tap can provide. Enough soap to create some suds is ideal.
-
Let the pan soak for at least 30 minutes, or longer for tougher spots.
Hot water helps to soften and lift stuck-on food particles. The longer it soaks, the more effective it will be.
-
Use a soft sponge or cloth to gently scrub the pan.
Avoid any abrasive materials. The aim is to wipe away the softened residue.
-
Rinse thoroughly and dry the pan immediately.
Ensure all soap is washed away. Dry with a soft towel to prevent water marks.
Preventing Future Burn Marks on Nonstick Pans
Knowing how to clean burnt nonstick pan is great, but preventing the problem in the first place is even better. This section offers practical advice to keep your pans in pristine condition.
Proper Cooking Techniques
Many burnt pan incidents happen due to issues with cooking technique rather than poor pan quality. Adjusting how you cook can significantly reduce the risk of burning food.
The foundation of a long-lasting nonstick pan lies in how you use it. Simple adjustments to your cooking habits can prevent those frustrating burnt messes from occurring in the first place. This means paying attention to heat levels, using the right amount of fat, and avoiding overcrowding the pan.
-
Use low to medium heat. Nonstick pans do not require high heat to cook effectively.
High heat can cause food to burn quickly and can also damage the nonstick coating over time. Medium heat is usually sufficient for most cooking tasks, allowing food to cook through without scorching.
-
Always use a small amount of oil or butter. Even with a nonstick surface, a little fat helps food slide easily and prevents sticking.
Think of it as an extra layer of insurance for your nonstick coating. A thin layer of oil helps to distribute heat evenly and provides additional slip.
-
Do not overcrowd the pan. This can lead to steaming rather than searing, and food is more likely to stick and burn.
Give your food space. Overcrowding causes the pan’s temperature to drop, and the food releases moisture, essentially steaming instead of cooking properly. This can lead to uneven cooking and burnt bits.
-
Stir or flip food regularly. This ensures even cooking and prevents one side from burning.
Constant attention is key. By moving your food around, you expose all sides to heat evenly and prevent localized hot spots where burning can occur.
Correct Storage and Maintenance
How you store and care for your nonstick pans when not in use also plays a role in their longevity and performance.
Proper storage might seem minor, but it’s crucial for maintaining the integrity of your nonstick cookware. Stacking pans carelessly can lead to scratches, while improper cleaning before storage can lead to residue buildup. Simple habits here protect your investment.
-
Avoid stacking pans directly on top of each other without protection. Use pan protectors or towels to prevent scratching.
When pans are stacked metal-on-nonstick, even slight movements can cause microscopic scratches that degrade the coating over time. Pan protectors, made of felt or soft cloth, create a barrier.
-
Do not use abrasive cleaners or scouring pads. Stick to soft sponges or cloths.
This reiterates a critical point: abrasive materials are the enemy of nonstick coatings. Always choose gentle cleaning tools.
-
Wash pans by hand rather than using a dishwasher. Dishwasher detergents are often harsh and can strip the nonstick coating.
While some pans are advertised as dishwasher safe, handwashing generally prolongs their life. The high heat and strong detergents in dishwashers can be detrimental to the nonstick surface.
-
Ensure pans are completely dry before storing them.
Moisture can lead to water spots or even encourage mold growth if stored for long periods, especially in humid environments. A quick dry with a towel is a small step that makes a big difference.
When It Might Be Time To Replace Your Nonstick Pan
Even with the best care, nonstick pans don’t last forever. Knowing when to retire a pan is also part of good kitchen practice.
Sometimes, despite your best efforts to clean and maintain them, nonstick pans reach the end of their lifespan. Recognizing the signs that a pan needs replacement is important for both cooking performance and food safety. Continuing to use a damaged nonstick pan can lead to food sticking and potentially ingesting damaged coating.
-
Significant scratching or peeling of the nonstick coating.
If you see deep scratches or large areas where the coating is flaking off, it’s time for a new pan. This not only affects cooking but also raises concerns about ingesting coating particles.
-
Food consistently sticks despite proper cleaning and seasoning.
If your pan has lost its nonstick properties entirely, even after trying various cleaning methods, it has likely reached the end of its useful life. The coating has degraded to the point where it can no longer perform its intended function.
-
Warping of the pan base.
A warped pan won’t sit flat on the stovetop, leading to uneven heating and potential safety hazards. This can also be a sign of the pan being overheated.
Frequently Asked Questions
Question: Can I use steel wool to clean a burnt nonstick pan?
Answer: No, you absolutely should not use steel wool or any other abrasive scrubber on a nonstick pan. Steel wool will scratch and permanently damage the nonstick coating, making it ineffective and potentially unsafe.
Question: How long should I soak a burnt nonstick pan?
Answer: For minor burns, 30 minutes might be enough. For more stubborn burnt-on food, soaking for a few hours or even overnight with a baking soda paste or a vinegar and water solution can be very effective.
Question: Is it safe to use vinegar on my nonstick pan?
Answer: Yes, diluted white vinegar is safe to use on nonstick pans. Its acidity helps break down burnt food without damaging the nonstick surface, especially when used in a simmer or soak method.
Question: What is the best method for removing blackened residue from a nonstick pan?
Answer: A combination of baking soda paste and gentle scrubbing, or a simmer with a vinegar and water solution, are generally the most effective and safest methods for removing blackened residue from nonstick pans.
Question: Should I use harsh chemicals to clean burnt food off a nonstick pan?
Answer: It is strongly advised against using harsh chemicals like oven cleaner or strong degreasers on nonstick pans. These can degrade or strip the nonstick coating, rendering the pan unusable and potentially unsafe.
Conclusion
Learning how to clean burnt nonstick pan is a valuable kitchen skill. You can restore pans using simple ingredients like baking soda and vinegar. Gentle scrubbing with soft tools is key. Prevent future burns with proper heat control and a little cooking fat. By following these tips, your nonstick pans will last longer and cook better. Keep them clean and well-maintained for years of enjoyable cooking.
Leave a Reply