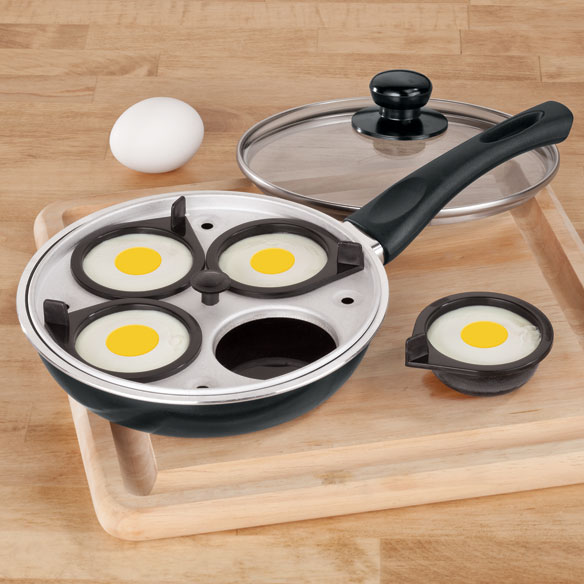
To best use an egg poacher pan, lightly oil the cups, crack an egg into each, and cook over simmering water. Ensure the lid is closed for even cooking.
Best Way to Use Egg Poacher Pan:Mastering the art of the perfect poached egg is a culinary quest for many. An egg poacher pan simplifies this process, offering a foolproof route to achieving soft, perfectly shaped eggs every time. This kitchen gadget is designed for ease and efficiency, allowing even novice cooks to create restaurant-quality poached eggs at home.
Whether you’re aiming to impress at brunch or just adding a touch of elegance to a weekday breakfast, the egg poacher pan is an indispensable tool. With its straightforward method and consistent results, it takes the guesswork out of poaching, making it a favorite for egg aficionados everywhere.
Introduction To Egg Poacher Pans
Welcome to the world of Egg Poacher Pans! These kitchen gadgets make breakfast easy and fun. Let’s dive into how they can change your morning routine.
The Rise Of The Egg Poacher Pan
Egg Poacher Pans have become popular recently. Many people love them for making perfect eggs. They are easy to use and clean. This makes breakfast faster and more enjoyable.
Benefits Of Using An Egg Poacher Pan
- Easy to Use: Just add water, place the egg, and cook.
- Healthy Cooking: Requires less oil or butter.
- Perfect Eggs: Get perfectly poached eggs every time.
- Clean-up is a Breeze: Non-stick surfaces mean easy cleaning.

Credit: www.wikihow.com
Selecting The Right Egg Poacher Pan
Egg poacher pans are a kitchen must-have for perfect poached eggs. The right pan makes all the difference. Here’s how to choose.
Material Matters: Choosing Quality
The material of your egg poacher pan is key. It affects durability and heat distribution. Look for these options:
- Stainless steel: Long-lasting and even heating.
- Aluminum: Lightweight and heats quickly.
- Non-stick: Easy egg release and clean-up.
Aim for pans with encapsulated bases. These have an aluminum or copper layer for better heat management.
Size And Capacity: Matching Your Needs
Consider how many eggs you cook at once. Pans come in various sizes:
| Capacity | Good for |
|---|---|
| 2-egg | Singles or couples |
| 4-egg | Small families |
| 6-egg or more | Large families or entertaining |
Remember, larger pans need more storage space. Pans with removable poaching cups offer versatility.
Preparing The Egg Poacher Pan
Using an egg poacher pan makes breakfast simple and fun. To start right, prepare the pan properly.
Cleaning Before Use
Always clean your egg poacher pan before use. This ensures your eggs are safe to eat. Follow these steps:
- Wash the pan with warm soapy water.
- Rinse thoroughly under running water.
- Dry with a soft cloth or air-dry.
Applying Oil Or Butter
Coating the poaching cups prevents eggs from sticking. Here’s the best way:
- Choose oil or butter for coating.
- Apply a thin layer inside each cup.
- Use a brush or paper towel for even coverage.
Now, your egg poacher pan is ready for perfect eggs!
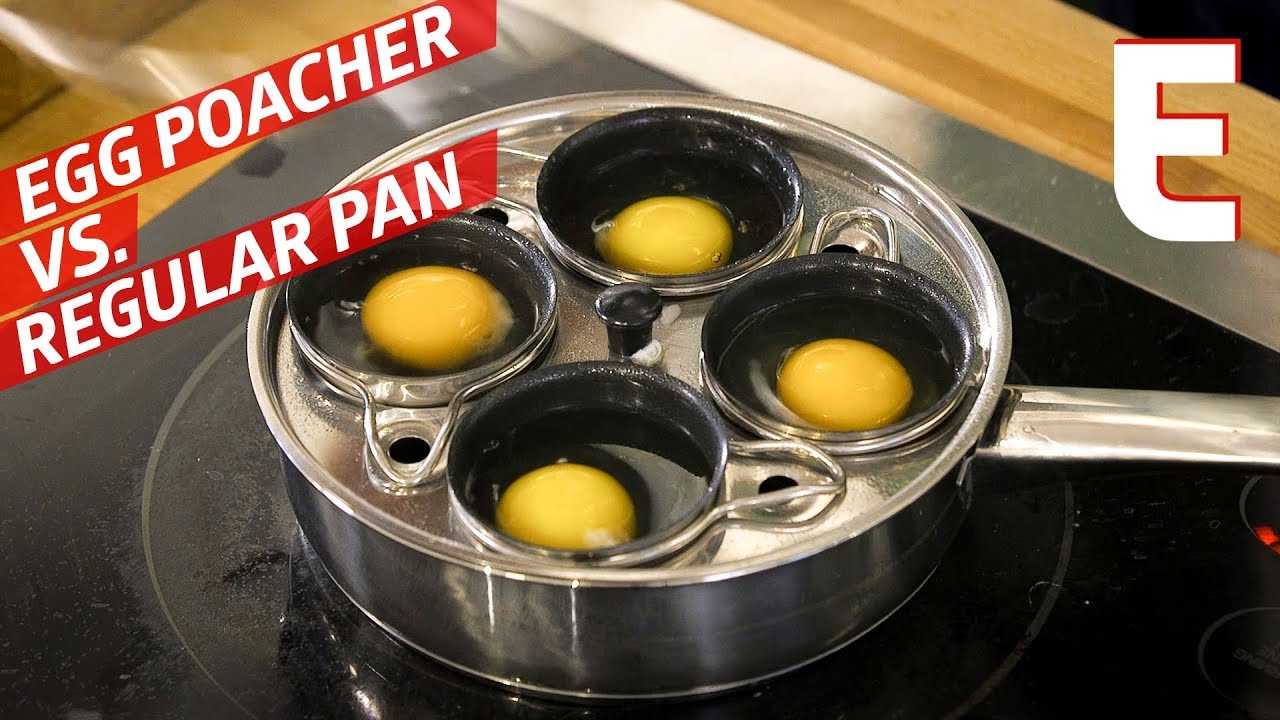
Credit: m.youtube.com
The Perfect Water Temperature
Achieving the ideal water temperature is crucial for mastering the art of using an egg poacher pan. Gentle heat ensures your eggs emerge perfectly cooked, with tender whites and runny yolks every time.
When it comes to poaching eggs, water temperature plays a crucial role. It’s the linchpin that ensures your egg emerges from the pan with a delicate, runny yolk and tender whites. Too hot, and your eggs will become rubbery; too cool, and they’ll be undercooked. Finding that sweet spot is key to mastering the art of egg poaching.
Heating The Water
Start by filling your poacher pan with water. Aim to fill it just enough to touch the bottom of the poaching cups. Now, place the pan on your stove and turn the heat to medium-high. Watch for tiny bubbles; this is a sign you’re nearing the ideal temperature. Small bubbles should form at the bottom, not a rolling boil. As soon as you see these bubbles, reduce the heat. The goal is a water temperature of about 180-190 degrees Fahrenheit, perfect for poaching.
Maintaining The Ideal Temperature
Once the correct temperature is reached, it’s time to maintain it. Keep the flame on low. If you have a kitchen thermometer, use it to check the water. No thermometer? Look for steady, small bubbles. If the water starts to simmer, turn down the heat. The eggs need a gentle environment to cook evenly. Drop in the eggs and let the consistent temperature do its magic. Gentle heat ensures your eggs will come out just right, with no surprises.
Remember, patience is key when poaching eggs. Maintain a steady hand with the temperature, and you’ll get the hang of the perfect poach in no time.
Cracking Eggs Into The Poacher
Perfect poached eggs start with the crack. A clean break means no shells, no mess. Egg poachers simplify the process. But technique matters. Follow these steps for flawless eggs every time.
Techniques For Crack And Drop
A gentle touch is key. Crack eggs on a flat surface, not the rim. Hold the egg close to the poacher cup. This reduces the drop. It prevents yolk breakage. Now, pour the egg smoothly into the cup.
- Use a knife for a precise crack.
- Flat surface prevents shell shatter.
- Crack one egg at a time.
Avoiding Shell Fragments
Shell pieces in poached eggs are unwanted. Prevent this with care. After cracking, check the egg. Use a spoon to scoop out any shell bits.
- Inspect each egg in a separate bowl.
- Remove fragments before poaching.
- Keep a clean work area for best results.

Credit: m.youtube.com
Timing For Flawless Poached Eggs
Mastering the Timing for Flawless Poached Eggs is key. A perfect poached egg has a runny yolk and firm whites. The egg poacher pan makes this easy. Let’s explore how to nail the timing every time.
Setting The Timer
Getting the timing right starts with your timer. Here’s a simple guide:
- Soft Poached: 4 minutes
- Medium Poached: 5 minutes
- Firm Poached: 6 minutes
Remember, start counting after the water boils. Always set a timer. This avoids guesswork.
Visual Cues For Doneness
Sometimes, looking is better than timing. Here are signs your eggs are ready:
- Whites solidify: No more liquid whites.
- Yolk wobble: Gently shake the pan. A perfect yolk wobbles.
Use a spoon to check. If the egg feels too soft, let it cook a bit more. If it’s firm, it’s done. Remember, eggs keep cooking a little after you remove them from the pan.
Serving And Presentation Tips
Serving and Presentation Tips play a crucial role in elevating the dining experience. A well-presented dish not only tantalizes the taste buds but also pleases the eyes, making the meal memorable. Follow these tips to master the art of serving poached eggs with style.
Plating Poached Eggs
Begin with a warm plate to keep the eggs cozy. A clean, white plate works best as it makes the colors pop. Gently place the poached eggs in the center. Ensure they are dry to avoid a watery plate. Use a paper towel if needed.
Garnishing For Visual Appeal
Adding garnishes not only enhances flavor but also improves the look of your dish. Consider these:
- Herbs: Fresh herbs like parsley, chives, or dill add a burst of color and flavor.
- Spices: A sprinkle of paprika or black pepper introduces warmth and depth.
- Sauces: A drizzle of hollandaise or a dollop of pesto can elevate the dish to new heights.
- Edible Flowers: For a touch of elegance, add edible flowers as a garnish. They’re beautiful and sometimes tasty too.
Remember, less is more. Aim for a balanced look without overcrowding the plate.
Cleaning And Maintaining Your Egg Poacher
Keeping your egg poacher clean ensures lasting performance. Proper maintenance prevents residue buildup. Follow these simple steps for a spotless poacher after every use.
Post-use Cleaning
Immediate rinsing prevents egg remnants from sticking. Use warm soapy water for effective cleaning. For non-stick surfaces, a soft sponge is best. Avoid abrasive materials that can scratch the surface.
- Rinse with hot water
- Clean with soapy water
- Soft sponge for scrubbing
- Rinse again
- Dry with a soft cloth
Storage Best Practices
Proper storage keeps your egg poacher ready for use. Ensure the poacher is completely dry before storing. Store in a cool, dry place. Stack carefully to avoid scratching non-stick surfaces.
- Dry thoroughly
- Store in a dry location
- Avoid stacking heavy items on top
Keep your poacher in top shape with these tips. Enjoy perfect poached eggs every time!
Troubleshooting Common Poaching Problems
Troubleshooting common poaching problems can turn anyone into an egg poaching pro.
Let’s look at some tips for perfect eggs every time.
Handling Broken Yolks
Broken yolks can ruin a poached egg experience.
Here’s how to keep yolks intact:
- Use fresh eggs as they hold together better.
- Gently crack the egg into a small dish first.
- Slide the egg into the poacher without dropping it.
Prevent broken yolks with these simple steps.
Dealing With Watery Eggs
Watery eggs can be disappointing.
Ensure firm whites and creamy yolks:
- Pat the eggs dry with a paper towel after poaching.
- Use a slotted spoon to remove excess water.
- Drain poached eggs on a clean cloth briefly.
These methods will help achieve the desired consistency.
Creative Recipes Using An Egg Poacher
Unlock the potential of your egg poacher pan with exciting recipes. Move beyond the classic poached egg and explore new culinary territories. These simple yet delicious ideas will transform your meals.
Poached Egg Delights
Turn breakfast into a feast with these poached egg delights:
- Egg Poacher Muffins: Place an English muffin, ham, and cheese in the poacher. Top with an egg for a quick delight.
- Avocado Toast: Spread ripe avocado on toast. Add a poached egg. Sprinkle with salt, pepper, and chili flakes.
- Shakshuka: Poach eggs in a spiced tomato sauce. Serve with crusty bread.
Incorporating Poached Eggs In Salads
Salads get an upgrade with the addition of poached eggs:
- Caesar Salad Twist: Top crisp romaine with a poached egg. Drizzle with Caesar dressing and Parmesan.
- Spinach and Bacon Salad: Mix fresh spinach, crispy bacon, and a poached egg. Toss with a vinaigrette.
- Kale and Quinoa Bowl: Combine kale, quinoa, veggies, and a poached egg. Mix with a light dressing.
Health Benefits Of Poached Eggs
Health Benefits of Poached Eggs often go unnoticed. Yet, they are a powerhouse of nutrition. Using an egg poacher pan simplifies cooking. It keeps the eggs’ shape perfect while preserving their health value. Poached eggs offer protein and vitamins without extra fat from oils.
Nutritional Profile
Eggs are rich in nutrients. One poached egg has:
- Protein: Essential for muscle repair
- Vitamins A, B5, B12: Good for eyes, brain, and energy
- Folate: Important for cell function
- Selenium: Boosts immune system
- Iron: Crucial for blood health
Poached Vs. Fried Eggs
Poached eggs are healthier than fried eggs. Let’s see why:
| Preparation Method | Calories | Fat |
|---|---|---|
| Poached | Approx. 71 | Approx. 5g |
| Fried | Approx. 90 | Approx. 7g |
Poached eggs have fewer calories and fat than fried eggs. They are cooked in water, not oil. This method keeps the egg low in fat.
Frequently Asked Questions
How To Use An Egg Poacher Pan?
Fill the poacher pan with water to the indicated level. Bring the water to a simmer. Crack an egg into each cup. Place cups in the pan. Cover and cook for 4-6 minutes. Remove eggs with a spoon. Enjoy your perfectly poached eggs.
How Do You Keep Eggs From Sticking To The Pan When Poaching?
To prevent eggs from sticking when poaching, ensure the water is simmering, not boiling. Add a splash of vinegar, create a gentle whirlpool, and carefully slide in the egg. Use fresh eggs for better cohesion.
Are Egg Poacher Pans Worth It?
Egg poacher pans simplify the poaching process, ensuring consistent results and saving time. They are a valuable tool for those who enjoy poached eggs regularly.
How Do You Use A Poaching Tray In An Egg Cooker?
To use a poaching tray in an egg cooker, first, fill the base with water as directed. Place the tray over the water. Crack an egg into each section of the tray. Close the lid and start the cooker. Cook until eggs reach your desired consistency.
Conclusion
Mastering the egg poacher pan can elevate your breakfast game to new heights. With the right technique, you can enjoy perfectly poached eggs anytime. Remember to keep it simple, follow the steps, and adjust to your taste. Happy poaching, and may your mornings be ever delightful with your newfound skill!
Leave a Reply