It’s a common cooking puzzle, especially when you’re just starting out. You put your food in the pan, hoping for a beautiful sear, but instead, it glues itself to the bottom! Learning how to prevent food from sticking to pans can feel tricky, but it doesn’t have to be.
This guide will show you simple steps that make a big difference. We’ll go through what you need to know to cook with confidence and enjoy your meals, mess-free.
Choose The Right Pan For The Job
Picking the correct pan is the first big step in stopping food from sticking. Different pan materials heat and hold heat in unique ways, affecting how your food cooks. Non-stick pans are popular because they offer a slippery surface, but they aren’t the only solution.
Understanding your pans helps you choose the best one for each cooking task, making it easier to prevent sticking. This section explores pan types and why they matter.
Non-Stick Pans Explained
Non-stick pans have a special coating, usually made of PTFE (like Teflon) or ceramic. This coating creates a surface where food slides easily, preventing most sticking issues. They are great for delicate foods like eggs or fish.
However, the coating can wear out over time, especially if exposed to high heat or scratched by metal utensils. Always use low to medium heat and soft cooking tools with non-stick pans to keep them in good condition.
- Non-stick coatings are designed to release food easily, reducing the need for excessive oil or butter. This can be helpful for people trying to cook with less fat.
- They require less cleaning effort because food doesn’t bake onto the surface. A quick wipe or wash is often all that’s needed.
- However, non-stick pans are sensitive. High heat can damage the coating, and abrasive cleaners or utensils can scratch it, ruining its non-stick properties.
Cast Iron Mastery
Cast iron pans are known for their incredible durability and even heating. When seasoned properly, cast iron develops a natural non-stick surface that gets better with age. This makes them ideal for searing meats and cooking foods that might stick in other pans.
Cast iron retains heat extremely well, which is great for consistent cooking temperatures. While they require a bit more care, like seasoning and hand washing, their long-lasting performance is worth it.
- A well-seasoned cast iron pan is naturally non-stick. Seasoning involves baking layers of oil into the pan’s surface, creating a smooth, protective layer.
- Cast iron is fantastic for high-heat searing, developing a beautiful crust on meats. It also holds heat wonderfully, ensuring consistent cooking results.
- These pans need specific care. Avoid dishwashers and harsh soaps, and always dry cast iron thoroughly to prevent rust. Re-seasoning occasionally keeps it in top shape.
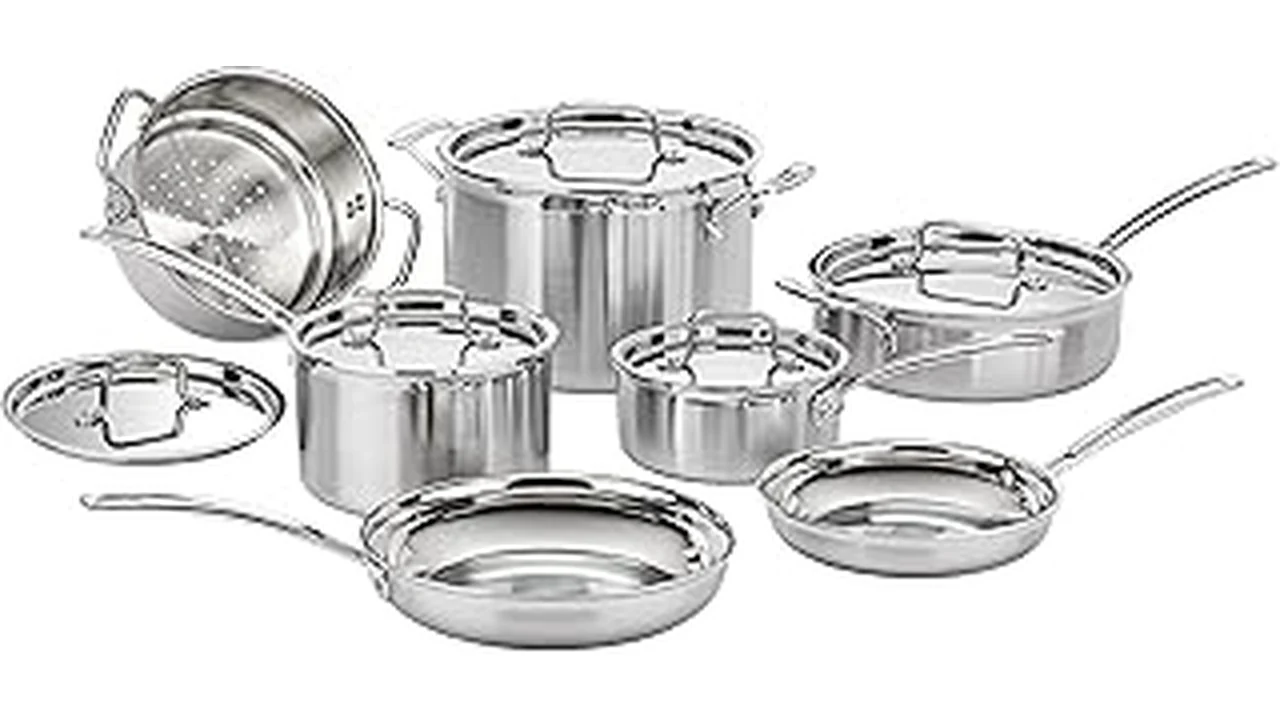
Stainless Steel Secrets
Stainless steel pans are a workhorse in many kitchens. They are durable, oven-safe, and don’t react with acidic foods. While they don’t have a natural non-stick surface like cast iron or a coating like non-stick pans, you can absolutely prevent food from sticking.
The key is proper heating and using the right amount of oil. Stainless steel heats up quickly and evenly, giving you great control over your cooking.
- Stainless steel pans are highly durable and can last a lifetime if cared for properly. They are also safe to use in the oven.
- They are excellent for deglazing, where you add liquid to the hot pan to loosen browned bits for sauces. This is easier when food doesn’t stick too much.
- To prevent sticking, preheat the pan thoroughly before adding oil and then food. This ensures a good sear and easier release.
Proper Heating Techniques Are Key
How you heat your pan makes a huge difference in preventing food from sticking. Too hot, and you might burn your food before it cooks; too cool, and it will steam and stick. Finding that sweet spot is essential.
Preheating your pan correctly before adding oil and then food helps create a barrier and ensures even cooking, which is a fundamental part of learning how to prevent food from sticking to pans. Let’s look at how to get your pans ready.
Preheating Your Pan Correctly
Preheating means letting your pan get to the right temperature before you add anything to it. For most cooking, you want the pan to be hot but not smoking. A good test is to flick a few drops of water into the pan; if they sizzle and evaporate quickly, it’s ready.
If they just sit there, it’s too cool. If they immediately turn to steam, it’s too hot. This step is crucial for a good sear and to stop food from sticking right away.
- Preheating helps create a thermal buffer. The hot pan transfers heat to the food quickly, helping it cook and form a crust rather than sticking.
- For non-stick pans, preheating should be done on medium-low to medium heat. High heat can damage the coating.
- For cast iron and stainless steel, preheating on medium heat is usually sufficient. You’ll see shimmering or feel the heat radiating from the pan.
When To Add Oil
Adding oil to a cold pan won’t give you the same results as adding it to a preheated pan. Once your pan is hot, you add your cooking fat, whether it’s oil, butter, or another fat. Let the oil heat up for a moment until it shimmers.
This indicates it’s hot enough to cook. Too little oil can still lead to sticking, while too much can make food greasy. The right amount creates a slick layer that further prevents adhesion.
- Adding oil to a preheated pan allows it to heat up and become a more effective barrier between the food and the pan surface.
- The amount of oil needed depends on the pan type and the food being cooked. For non-stick, less is often more. For stainless steel, a thin layer is usually best.
- Watch for visual cues. Oil should shimmer and move freely in the pan. If it looks like it’s smoking, it’s too hot.
The Leidenfrost Effect Explained
The Leidenfrost effect is a fascinating scientific principle that helps explain why water droplets “dance” on a very hot surface. When a liquid hits a surface significantly hotter than its boiling point, it instantly vaporizes on the bottom layer. This creates an insulating cushion of steam between the liquid and the hot surface.
This steam layer can lift the food slightly, reducing contact and preventing it from sticking. Achieving this effect is key for certain cooking techniques.
- This effect is most noticeable with water, where droplets bead up and skitter across a very hot pan instead of immediately evaporating.
- In cooking, a similar principle applies. When food hits a pan that is hot enough, a thin layer of steam can form between the food and the pan, acting as a lubricant.
- This phenomenon is most easily observed with stainless steel and cast iron pans heated to high temperatures. It requires the pan to be well above the boiling point of water.
Choosing And Using The Right Cooking Fat
The type and amount of cooking fat you use play a vital role in how well food releases from your pan. Different fats have different smoke points, which is the temperature at which they start to burn and break down. Using a fat with a smoke point suitable for your cooking temperature is essential.
Fats also add flavor and help distribute heat evenly. Learning about your cooking fats will greatly improve your success in how to prevent food from sticking to pans.
Understanding Smoke Points
A smoke point is the temperature at which a cooking fat begins to produce visible smoke. When fat smokes, it means it’s breaking down and can impart a burnt flavor to your food. It can also become less effective at preventing sticking.
Fats with higher smoke points are better for high-heat cooking like searing, while those with lower smoke points are best for lower-heat cooking like sautéing.
| Fat Type | Approximate Smoke Point (°F) | Best For |
|---|---|---|
| Butter | 300-350 | Low-heat sautéing, finishing sauces |
| Olive Oil (Extra Virgin) | 375-405 | Salad dressings, light sautéing |
| Vegetable Oil | 400-450 | General cooking, frying |
| Canola Oil | 400-450 | General cooking, baking |
| Grapeseed Oil | 420 | Searing, roasting |
| Avocado Oil | 520 | High-heat searing, frying |
Butter vs. Oil
Butter adds a wonderful rich flavor to food, but its smoke point is relatively low. This means it can burn easily at higher temperatures, leading to sticking and a burnt taste. Often, butter is combined with a more stable oil, like clarified butter (ghee) or mixed with a neutral oil, to raise its smoke point.
Oils like vegetable, canola, or grapeseed oil have higher smoke points and are better for searing and frying.
- Butter offers great flavor, especially for delicate items like eggs or pancakes. However, it can burn easily at higher heat.
- To use butter for higher heat, mix it with a bit of oil or use clarified butter, which has the milk solids removed and a higher smoke point.
- Neutral oils like vegetable or canola oil are good all-rounders. They have higher smoke points and don’t impart a strong flavor, making them versatile.
When To Use Shortening Or Lard
Shortening and lard are fats that have been used for generations. Shortening is a solid vegetable-based fat, while lard is rendered pork fat. Both have relatively high smoke points, making them good for frying and baking where crispiness is desired.
They can also contribute to a less sticky cooking surface due to their composition. However, their flavor profiles are different, and some people prefer not to use them for health or taste reasons.
- Shortening is a solid fat made from vegetable oils, often hydrogenated. It has a high smoke point and is good for frying.
- Lard, rendered pork fat, also has a high smoke point and can make fried foods very crispy. It has a distinct flavor that some people enjoy.
- Both can help prevent sticking due to their solid nature at room temperature and ability to create a smooth cooking surface.
Cooking Techniques For Stick-Free Results
Beyond choosing the right pan and fat, specific cooking methods can significantly help prevent food from sticking. These techniques focus on creating ideal conditions for food to cook properly and release easily. Mastering these simple steps will transform your cooking experience and make it easier than ever to achieve those delicious, perfectly cooked dishes without the frustrating cleanup.
This is the practical application of how to prevent food from sticking to pans.
Don’t Crowd The Pan
When you put too much food into a pan at once, it lowers the pan’s temperature drastically. This causes the food to steam instead of sear. Steamed food is much more likely to stick.
It also prevents the food from browning properly, leading to a less appealing dish. Leave space between your food items so that heat can circulate freely around each piece. This allows for better browning and easier release.
- Overcrowding causes food to steam rather than sear. This leads to a mushy texture and increases the likelihood of sticking.
- Give each piece of food enough space so that air can circulate around it. This promotes even cooking and browning.
- If you are cooking a large batch, it is better to cook in smaller batches. This ensures that the pan remains hot enough to sear the food effectively.
Let Food Cook Undisturbed
One of the biggest temptations when cooking is to constantly move or stir your food. While this is sometimes necessary, for many items, it’s best to let them cook undisturbed for a period. This allows a crust to form.
Once that crust has developed, the food will naturally release from the pan. If you try to move it too soon, you’ll likely tear it and leave bits stuck to the bottom. Patience is a virtue in the kitchen!
- Allowing food to cook undisturbed for a few minutes helps develop a flavorful crust. This crust is what allows the food to release cleanly.
- When the food is ready to be flipped or moved, it will naturally lift from the pan with minimal effort. If it resists, it needs a little more time.
- This is especially important for searing meats, pan-frying chicken, or cooking fish fillets. The initial contact with the hot pan is crucial for creating that desirable release.
Deglazing For Flavor and Release
Deglazing is a technique where you add liquid to a hot pan after cooking to loosen any browned bits stuck to the bottom. These browned bits, called fond, are packed with flavor. Adding a liquid like broth, wine, or water creates steam and dissolves the fond.
This not only captures delicious flavor for sauces but also helps lift any stubborn food particles from the pan surface, making cleanup easier and preventing future sticking.
- Deglazing involves adding liquid to a hot pan to dissolve browned food particles. These particles are full of flavor and can be used to create sauces.
- Use liquids like wine, broth, water, or even juice. The heat of the pan will turn the liquid into steam, which helps lift the stuck bits.
- This process also helps clean the pan, reducing the chance of residue causing sticking in the future. It’s a win-win for flavor and ease of cleaning.
Post-Cooking Care For Your Pans
How you clean and care for your pans after cooking is just as important as how you cook in them. Proper cleaning prevents residue buildup, which can make food stick more easily next time. Different pan materials require different cleaning methods to maintain their non-stick properties and longevity.
Taking a few minutes to care for your pans will ensure they serve you well for years to come.
Cleaning Non-Stick Pans
Non-stick pans are best cleaned with a soft sponge or cloth and mild dish soap. Avoid abrasive scrubbers, steel wool, or harsh detergents, as these can scratch and damage the non-stick coating. If there are stubborn bits of food, soak the pan in warm, soapy water for a short time before cleaning.
Always rinse thoroughly and dry completely to prevent water spots.
- Use a soft sponge or cloth and mild dish soap. Avoid abrasive scrubbers that can scratch the coating.
- Soak stubborn residue in warm, soapy water. Never use steel wool or harsh chemicals on non-stick surfaces.
- Dry the pan thoroughly after washing to prevent water spots and maintain the coating.
Caring For Cast Iron
Cast iron pans should ideally be cleaned without soap, especially if they are well-seasoned. Use hot water and a stiff brush or scraper to remove food bits. If necessary, a small amount of mild soap can be used sparingly, but always rinse thoroughly.
After cleaning, dry the pan completely immediately. Rubbing a thin layer of cooking oil into the surface after drying helps maintain the seasoning and prevents rust.
- Clean cast iron with hot water and a stiff brush. Avoid dish soap if possible, as it can strip the seasoning.
- If soap is needed, use only a tiny amount of mild soap and rinse very well.
- Always dry cast iron immediately and thoroughly. Applying a light coat of oil after drying helps maintain its non-stick properties and prevents rust.
Maintaining Stainless Steel
Stainless steel pans can usually be cleaned with a sponge and dish soap. For tougher stains or burnt-on food, a paste of baking soda and water can be effective. You can also use specialized stainless steel cleaners.
To restore shine, you can boil water in the pan with some vinegar or lemon juice. Always dry stainless steel thoroughly to prevent water spots and streaks.
- Use a sponge and dish soap for everyday cleaning.
- For tough stains, a baking soda paste or a specialized stainless steel cleaner can work well.
- Dry stainless steel thoroughly after washing to prevent water spots and maintain its shine.
Real-Life Examples Of Preventing Sticking
Learning how to prevent food from sticking to pans is best understood through real-world application. Think about common cooking scenarios and how these principles come into play. These examples show how small adjustments can lead to big improvements in your cooking results and reduce cleanup time significantly.
Scenario 1 Fried Eggs
Imagine you want perfect fried eggs with no sticking. You’ll grab a non-stick or well-seasoned cast iron pan. You heat the pan gently on medium-low.
Once warm, add a small amount of butter or oil. Let it shimmer slightly. Crack your eggs into the pan, ensuring they have space.
Resist the urge to move them immediately. Let them cook until the whites are set and a light golden edge forms. Then, slide your spatula underneath; they should lift easily.
- Choose a non-stick or properly seasoned cast iron pan.
- Preheat the pan over medium-low heat.
- Add a small amount of butter or oil and let it shimmer.
- Crack eggs into the pan, leaving space between them.
- Let eggs cook undisturbed until whites are set and edges are lightly golden.
- Slide a spatula underneath; the eggs should release easily.
Scenario 2 Pan-Searing Chicken Breasts
For pan-seared chicken breasts, you’ll want a stainless steel or cast iron pan. Preheat the pan over medium-high heat. Add a tablespoon of high-smoke-point oil like grapeseed or avocado oil.
Wait until the oil shimmers. Pat your chicken breasts dry to ensure a good sear. Season them well.
Carefully place the chicken in the hot pan, ensuring not to crowd it. Let each side sear for 3-5 minutes without moving it until a golden-brown crust forms. The chicken should release easily when ready to flip.
- Use stainless steel or cast iron pan.
- Preheat the pan over medium-high heat.
- Add a tablespoon of high-smoke-point oil and wait for it to shimmer.
- Pat chicken breasts dry and season them well.
- Place chicken in the hot pan, leaving space.
- Sear undisturbed for 3-5 minutes per side until golden brown.
- Chicken should release easily when ready to flip.
Statistics On Kitchen Frustrations
Kitchen mishaps, like food sticking to pans, are quite common. A survey indicated that over 60% of home cooks experience food sticking to their pans at least once a week. This leads to frustrating cleanup and often wasted food.
Understanding the right techniques can significantly reduce these occurrences. For example, proper pan preheating is cited as the most important factor by 45% of cooks who rarely experience sticking.
Another study found that 70% of home cooks admit to not always preheating their pans sufficiently. This simple step is crucial for learning how to prevent food from sticking to pans. When asked about cleaning, 55% of people find stuck-on food the most annoying part of kitchen cleanup, highlighting the importance of preventative measures.
Frequently Asked Questions
Question: What is the best type of pan to prevent food from sticking
Answer: Non-stick pans are designed for this purpose, but well-seasoned cast iron and properly heated stainless steel pans can also prevent sticking effectively.
Question: Should I use oil or butter to prevent sticking
Answer: It depends on the heat. Butter is great for low heat, but oils with higher smoke points are better for higher heat cooking like searing to avoid burning and sticking.
Question: How long should I preheat my pan
Answer: Until it’s hot enough that a drop of water sizzles and evaporates quickly. This usually takes a few minutes on medium heat, but watch for visual cues.
Question: Can I use metal utensils on my pans
Answer: Never use metal utensils on non-stick pans as they will scratch the coating. You can use metal utensils on stainless steel and cast iron, but be mindful of scratching seasoned cast iron.
Question: Why does my food keep sticking even when I use oil
Answer: This could be because the pan wasn’t preheated enough, you added food before the oil was hot, or you crowded the pan, lowering the temperature too much.
Final Thoughts
Mastering how to prevent food from sticking to pans is a fundamental cooking skill. By choosing the right pan, preheating it correctly, using the appropriate cooking fat, and employing smart cooking techniques, you can enjoy frustration-free cooking. Remember to care for your pans after use, and they will serve you well.
Happy cooking and enjoy your perfectly cooked, mess-free meals!
Leave a Reply